

You already pay for a domain. You probably already run a website on it. But the moment mail comes up, you hand the keys to Google, Microsoft, or whoever else, and your inbox becomes something they can scan, index, and quietly build a profile around.
That’s the trade almost everyone makes without ever noticing they made it.
There’s another option. You can run your own private email server, on your own domain, with unlimited addresses and nobody reading over your shoulder. This guide shows you exactly how, using mailcow, a free and open-source email suite built on Docker, it also called self-hosted email server. No sysadmin background required, just patience, because email is unforgiving of shortcuts.
Here’s the part most tutorials leave out, though: getting mailcow running is the easy 20%. Getting your mail to actually land in the inbox instead of the spam folder is the other 80%, and it’s where almost everyone gets stuck. This guide covers both.
What You’ll Walk Away With
Click any topic to expand or collapseSelf-hosted Docker mail server setup
A working mail server on your own domain, running in Docker, with unlimited mailboxes and no monthly per-seat fee.
Email deliverability (SPF, DKIM, DMARC, PTR)
A deliverability foundation — SPF, DKIM, DMARC, and PTR records configured the way Gmail and Outlook actually expect them.
IP warm-up & reputation management
A realistic warm-up plan so a brand-new server IP doesn’t get blacklisted in week one.
Server hardening & anti-abuse security
A hardened setup that won’t turn into the kind of security incident that makes the news.
Why Bother Self-Hosting Email in 2026?
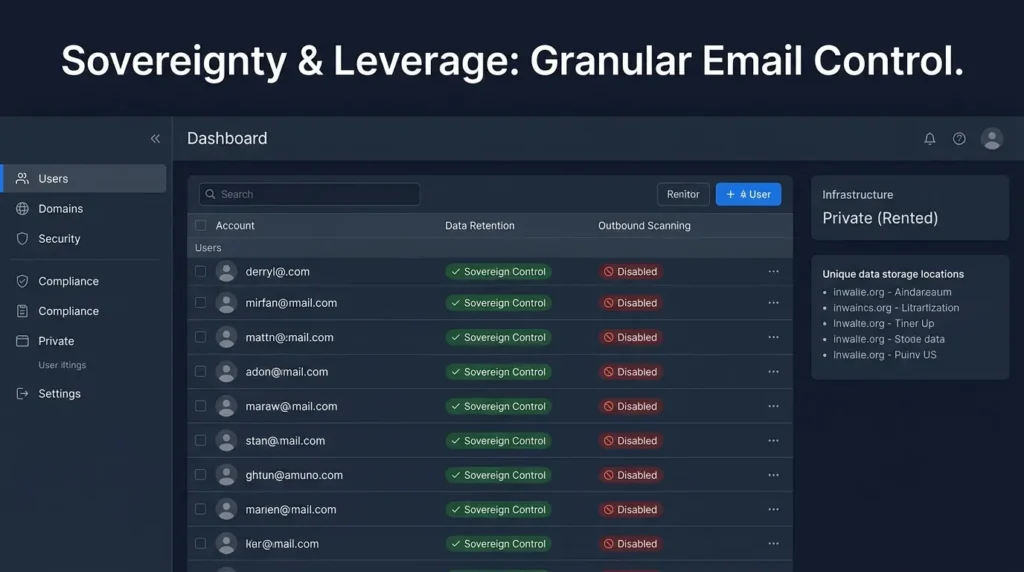
Three reasons keep coming up: privacy, control, and cost. But there's a fourth one people underestimate, leverage.
When your email lives on infrastructure you rent (not infrastructure a hyperscaler owns), nobody can suspend your account for a billing dispute, quietly change a retention policy, or scan your messages to sharpen an ad profile. You decide what's kept, for how long, and who can create a new address.
This is the same trade-off that exists for cloud storage: you either accept a vendor's acquisition risk or you accept the maintenance burden of self-hosting. We mapped both sides, including a six-surface acquisition-risk framework and when self-hosted Nextcloud actually wins, in our private cloud storage comparison.
This isn't a fringe concern anymore. It's become a boardroom-level and government-level issue. In one of the most closely watched digital sovereignty projects in Europe, the German state of Schleswig-Holstein completed a six-month migration of its entire government email system off Microsoft Exchange and Outlook onto the open-source Open-Xchange platform, a transfer that, according to reporting from The Register, covered more than 40,000 mailboxes and over 100 million messages and calendar entries. It wasn't painless; officials publicly acknowledged downtime and delays during the switch. But it shipped, and it's now the production system for tens of thousands of public servants.
That project didn't happen in a vacuum. Regulators had already raised the alarm on relying on a single U.S. cloud vendor for sensitive email. As migration case studies compiled by MDaemon document, the EU's Data Protection Supervisor ruled in March 2024 that the European Commission's use of Microsoft 365 infringed EU data-protection rules, citing vague contracts and uncontrolled data transfers outside the EU, and ordered the Commission to stop sending EU citizen data to Microsoft's non-EU servers. When even the institutions writing privacy law can't fully control where their own email data ends up, "just use Gmail" stops looking like the safe default.
Self-hosting isn't automatically safer, though, it's only as safe as the person running it. When a rushed team inside the U.S. Office of Personnel Management stood up an internal mail system without the legally required privacy review, court filings reported by Yahoo News confirmed it collected federal employee names, government email addresses, and short voluntary email responses from roughly two million people, and the rollout landed the agency in federal court. That's the cautionary flip side of this whole guide: control without discipline is just a different kind of risk.
There's a quieter benefit too. Running your own mail server forces you to actually understand how email works at the DNS level, MX records, authentication, reputation scoring. That knowledge doesn't expire, and it makes you noticeably better at diagnosing "why did my email end up in spam" problems anywhere, not just on your own server.
Self-hosting email buys you privacy and control, but only if you treat authentication and governance as seriously as the institutions that get this wrong publicly.
What You Actually Need Before You Touch a Terminal
Let's kill the most common misconception first: you cannot self-host email from home.
Most residential ISPs block outbound port 25, the port mail servers use to talk to each other. Even the ones that don't block it won't give you a static IP, won't let you set a PTR record, and will very likely have you sharing an IP block that's already flagged on spam lists. Home hosting for email just doesn't work, not "it's hard," but structurally not possible for most people.
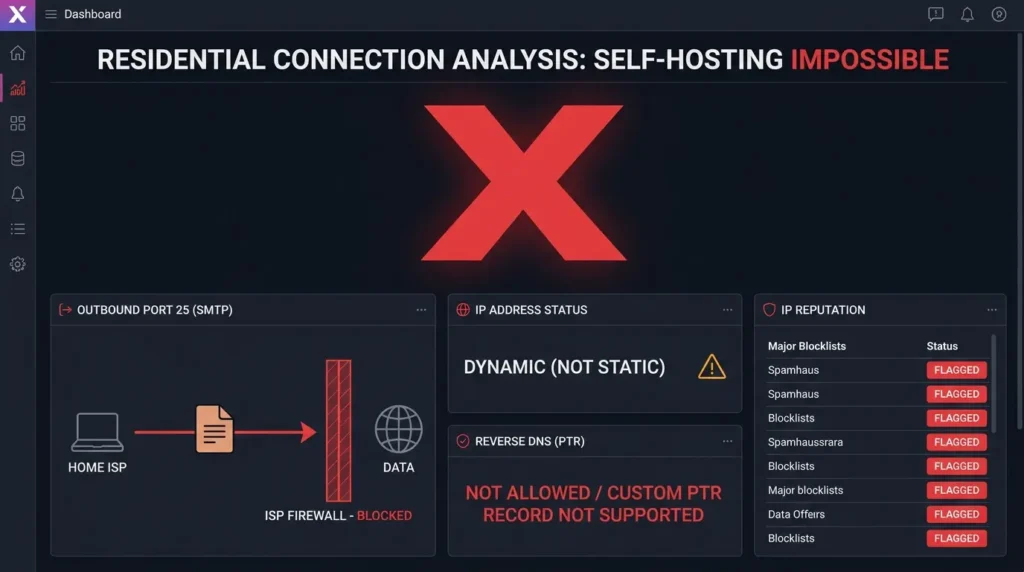
What you need instead is a VPS (Virtual Private Server) that:
- Does not block port 25 outbound
- Lets you request a custom PTR record (reverse DNS)
- Hands you a clean IP that isn't already sitting on a blocklist
Not every provider qualifies. Several major clouds, AWS, Google Cloud, and even DigitalOcean by default, block port 25 unless you specifically request an exception, and some never grant it for new accounts. Provider choice matters more here than almost anywhere else in this project.
You'll also need a domain name you control the DNS for. It doesn't matter where it's registered, as long as you can edit the zone file (sometimes labeled "DNS management" or "DNS records" in your registrar's dashboard).
📌 Minimum System Requirements
According to mailcow's official project documentation, the suite officially requires 6 GB RAM, 20 GB disk space, and 1 CPU core at minimum.
If you want ClamAV antivirus scanning active, budget 8 GB RAM or more.
Running on 4 GB works, but only if you disable ClamAV — otherwise the container will crash under load.
What Is a Self-Hosted Email Server, Exactly?
A self-hosted email server is a mail system you run on infrastructure you control, typically a VPS, rather than a subscription mailbox managed by a third party like Google Workspace or Microsoft 365. You own the storage, the retention rules, and the authentication configuration, and you're solely responsible for keeping it secure and deliverable.
Section takeaway: Skip the home-server dream. Rent a VPS from a provider that explicitly allows port 25 and PTR records, or nothing else in this guide will matter.
What's Actually Running Under the Hood?
Before you touch a single command, it helps to see the shape of what you're building. Mailcow isn't one program, it's roughly a dozen small services, each handling one job, talking to each other inside Docker.
SMTP in/out
IMAP/POP3
Webmail
Anti-spam scoring
Antivirus
Cache / queues
Every box above is its own Docker container. If one shows "unhealthy" later, this is the map you'll use to find it.
Section takeaway: Every mailcow "container" you'll see later in docker compose ps maps to one labeled box here. Keep this picture in mind, it makes troubleshooting dramatically faster.
Choosing a VPS That Won't Sabotage You
This is a decision people rush, and it's the one decision that's hardest to undo later, moving a mail server to a new IP means restarting your entire sender reputation from zero.
| Configuration | RAM | Disk | Antivirus | Best For |
|---|---|---|---|---|
| Budget | 4 GB | 20 GB | ❌ Disabled | Personal use, low volume |
| Recommended | 8 GB | 40 GB | ✅ Enabled | Small teams, full security stack |
| Power User | 16 GB+ | 80 GB+ | ✅ Enabled | High volume, multiple domains |
Once your VPS is provisioned, write down its public IP address somewhere. You'll need it constantly for the next hour.
Section takeaway: Pick a VPS provider first, based on port 25 and PTR support, the RAM tier is a secondary decision you can size to your budget.
📖 Want the Complete Offline Field Guide?
Keep this entire walkthrough, DNS lookup cheat sheets, terminal commands, and Postfix/Rspamd troubleshooting error codes handy on your desktop.
Picking a Data Center Region (And Why Microsoft Makes This Harder Than Gmail)
Three decisions that seem minor at setup time end up mattering more than people expect once the server is live.
Provider choice comes down to more than price
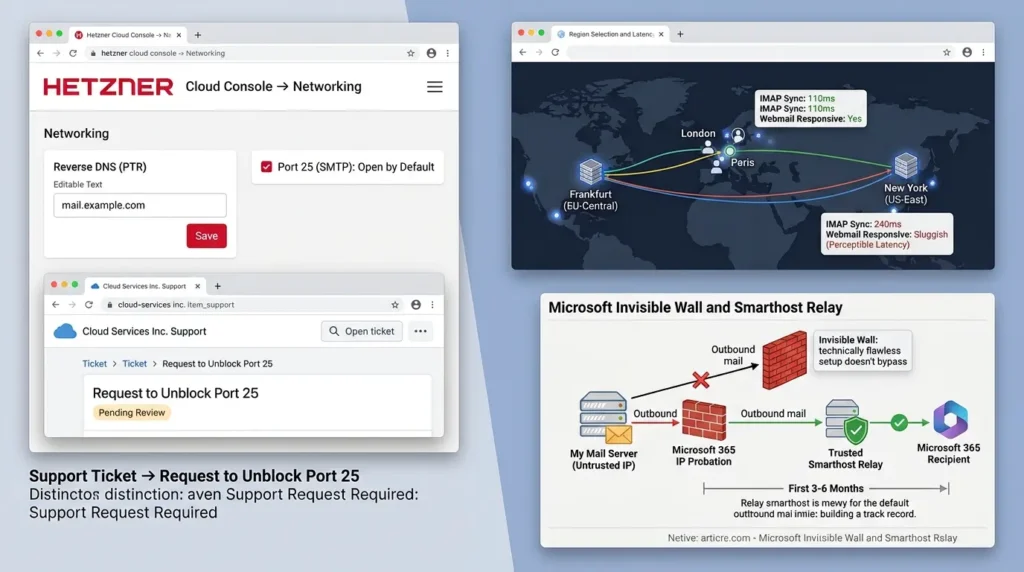
The port 25 and PTR situation actually varies meaningfully between the popular options. Hetzner ships with port 25 open by default and lets you edit the PTR record yourself directly in the console's Networking tab, no support ticket required, according to Hetzner's own documentation. DigitalOcean and Vultr, by contrast, block port 25 by default and require a support request to unblock it, a distinction confirmed by an independent comparison of mail-friendly VPS providers.
All three, and most other major clouds, let you set a PTR record once port 25 is open, the friction is entirely in how many steps it takes to get there, and it's worth checking before you commit a domain's reputation to a provider.
Region should follow your recipients, not habit
If most of the people you're emailing are on one continent, picking a data center close to them will noticeably improve IMAP sync and SOGo webmail responsiveness, the physical distance between your server and your daily users adds real, perceptible latency that has nothing to do with deliverability. It won't affect whether mail lands in the inbox, but it will affect how the whole setup feels to use every day.
Microsoft is where most people hit an invisible wall
Gmail's spam filtering is aggressive but transparent, get SPF, DKIM, and DMARC right, warm up properly, and it usually responds. Microsoft 365 and Exchange Online behave differently: they apply a probation period to unfamiliar sending IPs that a technically flawless setup doesn't automatically bypass.
If a meaningful share of your recipients are on Microsoft's ecosystem, don't treat the smarthost relay covered later in this guide as an emergency fallback, treat it as the default for the first three to six months. Route outbound mail to Microsoft-hosted domains through a relay while your own IP builds a track record, then switch back once it's established.
Provider choice decides how much friction you'll fight before you can even send your first email. Region decides how the finished server feels day to day. Neither is reversible without starting your IP reputation over, so get both right before you provision.
Step 1: Setting Up Your DNS Records
This is the unglamorous part, and it's also the part that decides whether any of this works. Get DNS wrong and your mail bounces, disappears, or lands in spam, no error message, no explanation, just silence.
DNS tells the internet where your mail server lives, who's authorized to send on your domain's behalf, and how receiving servers should verify your messages. Log into your registrar, open DNS management, and add these records one at a time.
| Record | Name / Host | Value / Target | Purpose |
|---|---|---|---|
| A | yourdomain.org | Your server IP | Points root domain to server |
| A | mail.yourdomain.org | Your server IP | Points mail subdomain to server |
| MX | @ (root) | mail.yourdomain.org (priority 10) | Routes incoming mail to your server |
| CNAME | autodiscover | mail.yourdomain.org | Auto-config for Outlook |
| CNAME | autoconfig | mail.yourdomain.org | Auto-config for Thunderbird |
| TXT | yourdomain.org | v=spf1 mx a -all | SPF — authorizes your server to send |
| TXT | _dmarc.yourdomain.org | v=DMARC1; p=none | DMARC — starts in monitor mode |
After saving the A, MX, and CNAME records, verify propagation using a tool like mxtoolbox.com, search for mail.yourdomain.org and confirm the A record resolves. Propagation can technically take up to 24 hours, though it's usually much faster.
The PTR Record - The One You Can't Set Yourself
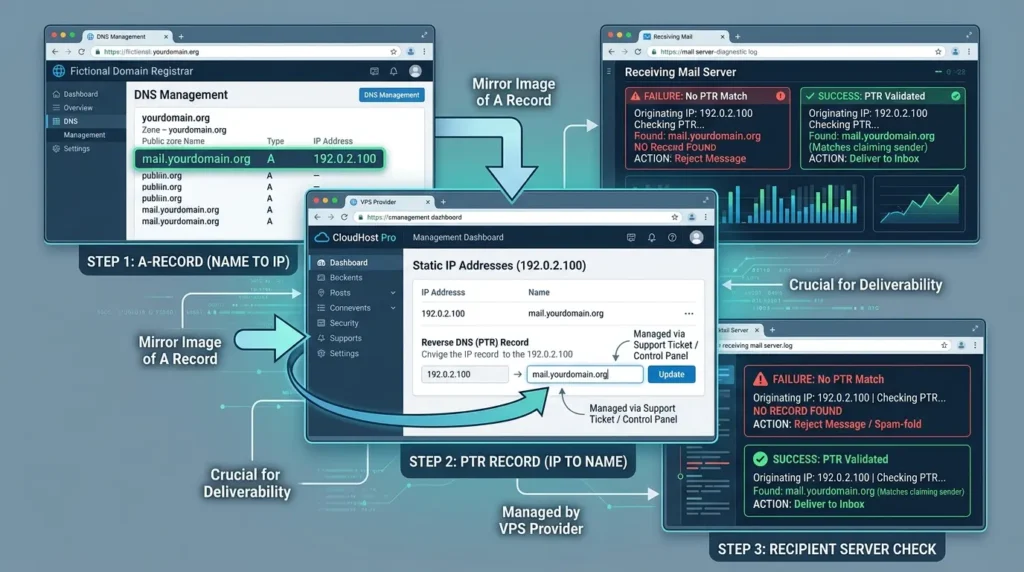
Here's the detail that trips up almost every first-timer. A PTR record (reverse DNS) is the mirror image of an A record: instead of mapping a name to an IP, it maps your IP back to mail.yourdomain.org.
Receiving servers check this to confirm the IP sending them mail actually belongs to who it claims to be. No matching PTR record, and major providers will reject or spam-fold your messages on sight.
The catch: you can't touch this from your domain registrar. Only your VPS provider controls reverse DNS for their IP ranges. Open a support ticket and ask them to set it, most decent providers handle it within minutes.
The Hidden IPv6 Trap Nobody Mentions
Here's a failure mode that catches even people who did everything else right. Most modern VPS providers enable IPv6 by default, right alongside your IPv4 address. If your server has an IPv6 address and you never gave it a AAAA record or an IPv6 PTR record, something unpleasant happens: some receiving servers will try to reach you over IPv6 first, find no matching reverse DNS, and reject the message outright, even though your IPv4 setup is flawless.
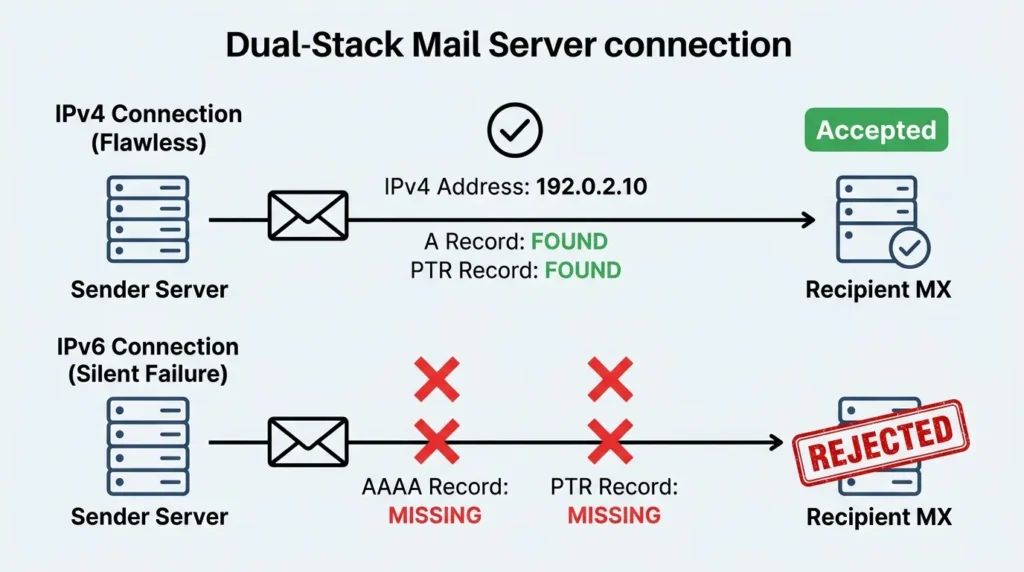
This is deliverability failing silently. Your mail-tester score can look fine while a chunk of real-world mail still bounces, because the test happened over IPv4 and the live traffic didn't.
You have two honest options:
- Do it properly: Add a AAAA record pointing to your server's IPv6 address, and request an IPv6 PTR record from your VPS provider, the same way you requested the IPv4 one.
- Turn IPv6 off for mail entirely: if your provider's IPv6 support is inconsistent. Edit Postfix's configuration to force IPv4-only sending:
Postfix config (extra.cf):
inet_protocols = ipv4Restart Postfix after saving that change. A half-configured IPv6 setup is worse than no IPv6 at all, pick one option and commit to it.
DNS is the foundation, not a formality. If the A, MX, SPF, and PTR records aren't right, nothing downstream will save your deliverability.
Step 2: Server Access and Base Setup
Open a terminal. Mac and Linux have one built in; Windows users can use Windows Terminal or PowerShell.
Connect via SSH:
Bash:
ssh root@yourdomain.orgUpdate the system and install a few dependencies:
Bash:
apt update && apt upgrade -y apt install git curl openssl -yDon't keep working as root, that's an unnecessary risk on a server that's about to be internet-facing. Create a dedicated user instead:
Bash:
adduser tony usermod -aG sudo tony su - tony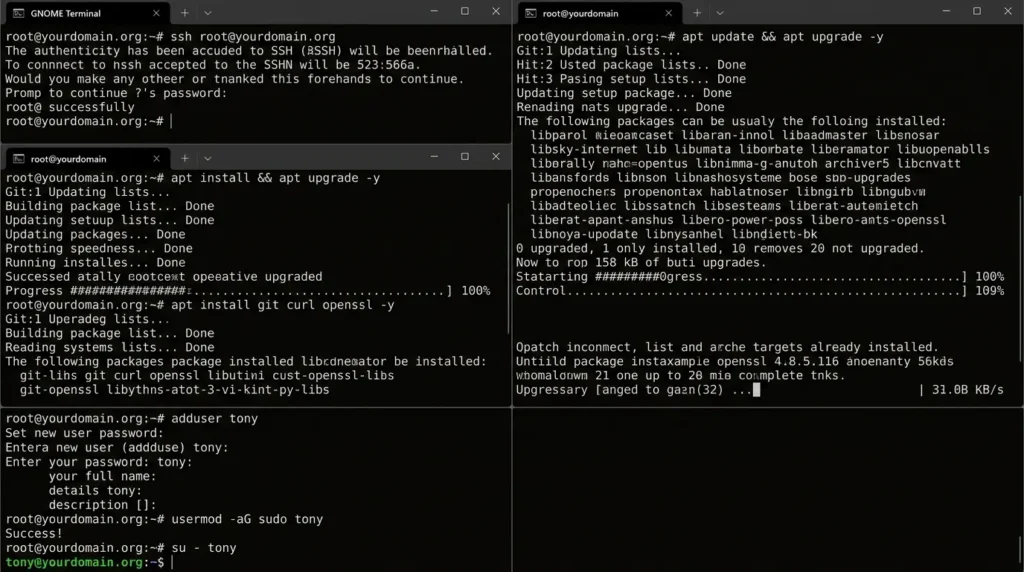
Give Yourself a Swap Safety Net Before You Go Further
This step is easy to skip and easy to regret. Mailcow's official minimum is 6 GB RAM, but that number assumes steady-state usage, it doesn't account for the short spikes that happen when ClamAV updates its virus definitions, Rspamd runs a bulk rescan, or MariaDB handles a burst of concurrent IMAP connections. Operators running mailcow at the minimum spec commonly report exactly this pattern: everything is fine for weeks, then one of those spikes triggers Linux's out-of-memory killer, and a container gets silently terminated mid-task.
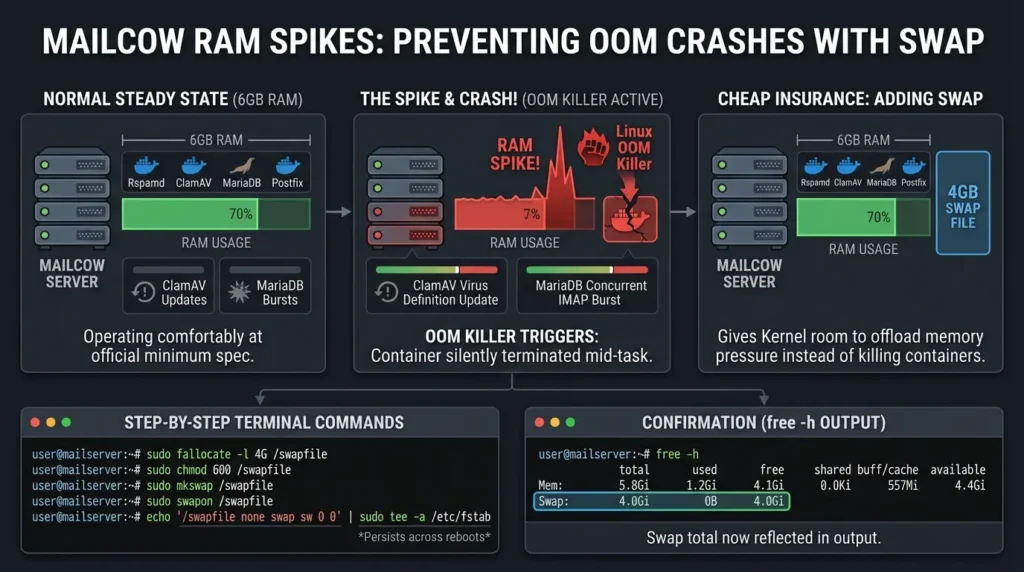
A swap file doesn't add real processing headroom, but it gives the kernel somewhere to offload memory pressure instead of killing a container outright, cheap insurance for a few minutes of setup. On a budget 4–6 GB droplet, add a 4 GB swap file now:
Bash:
sudo fallocate -l 4G /swapfile sudo chmod 600 /swapfile sudo mkswap /swapfile sudo swapon /swapfile echo '/swapfile none swap sw 0 0' | sudo tee -a /etc/fstabThat last line makes the swap file persist across reboots, without it, you'd have to re-enable it manually every time the server restarts. Confirm it's active with free -h; you should see the swap total reflected in the output.
Swap won't fix an undersized server permanently, but it's the difference between a container gracefully slowing down under load and getting killed outright during a memory spike.
Step 3: Installing Docker
Mailcow runs as a set of Docker containers, nginx, Redis, ClamAV, SOGo, Postfix, Dovecot, and a handful of others, each doing one job. Docker keeps them isolated and manageable.
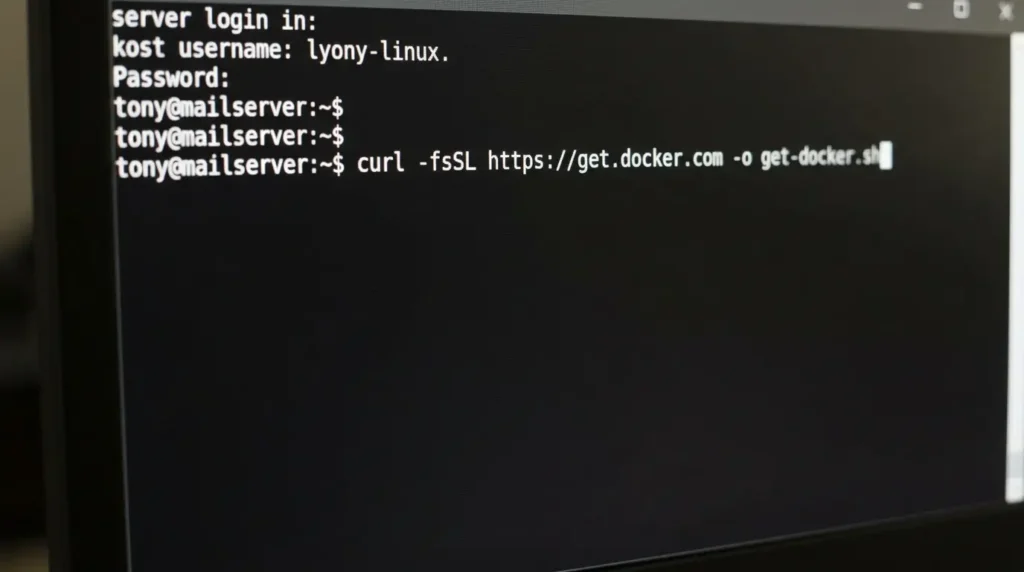
Bash:
curl -fsSL https://get.docker.com -o get-docker.sh sudo sh get-docker.sh sudo usermod -aG docker tony sudo rebootOnce the server restarts, log back in as your new (non-root) user.
Step 4: How Do You Install and Configure Mailcow?
This is one of those steps people expect to be complicated. It isn't, as long as you follow the order.
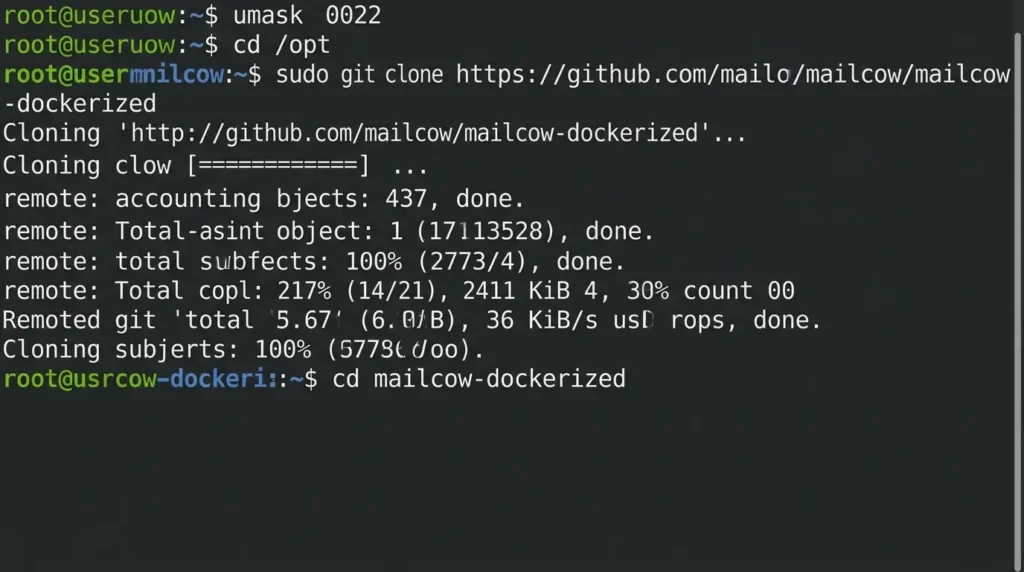
1 . Set the correct file permission mask, then clone the mailcow repository:
Bash:
umask 0022 cd /opt sudo git clone https://github.com/mailcow/mailcow-dockerized cd mailcow-dockerized2 . Confirm your exact time zone string before you run the generator:
Bash:
timedatectl list-timezones | grep York3 . Run the configuration generator:
Bash:
sudo ./generate-config.sh4 . Answer the three prompts:
- Your mail hostname (mail.yourdomain.org),
- your time zone (e.g. America/New_York),
- and your branch (choose "stable").
5. Watch the blocklist check the script runs automatically.
If it flags your server's IP, stop here, get a different IP before going further. A blacklisted starting IP dooms your deliverability before you've sent a single email.
⚠️ Two Different Things, Easy to Confuse
Your server's hostname is mail.yourdomain.org. Your actual email addresses will be tony@yourdomain.org — no "mail." prefix. Mixing these up during configuration is one of the most common setup mistakes.
The config generator does more than write a file, its blocklist check is your first real deliverability checkpoint. Don't skip past a warning there.
Step 5: Starting the Mailcow Stack
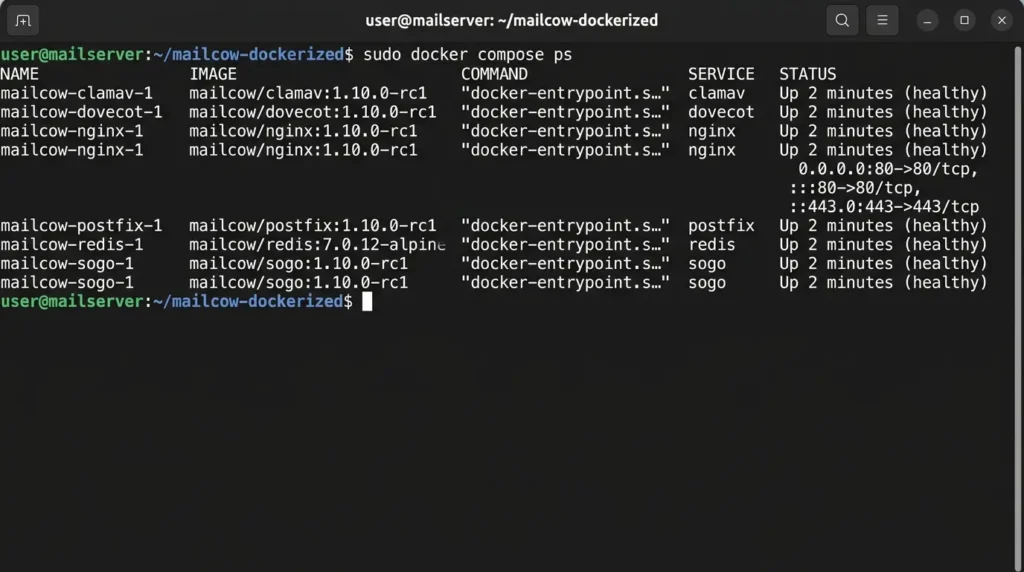
Bash:
sudo docker compose pull sudo docker compose up -d sudo docker compose psYou should see containers for Postfix (SMTP), Dovecot (IMAP), nginx, Redis, ClamAV, and SOGo, every one showing status "Up." If anything shows "unhealthy" or "exited," stop and check the container logs (sudo docker compose logs <container-name>) before moving on.
Step 6: Domains, Mailboxes, and the Admin Panel
Open https://mail.yourdomain.org in a browser. There are two login pages on that URL, one for admin, one for regular mailbox users. Look for "Login as Admin," and use the default credentials (admin / moohoo) once, then change that password immediately under System → Configuration.
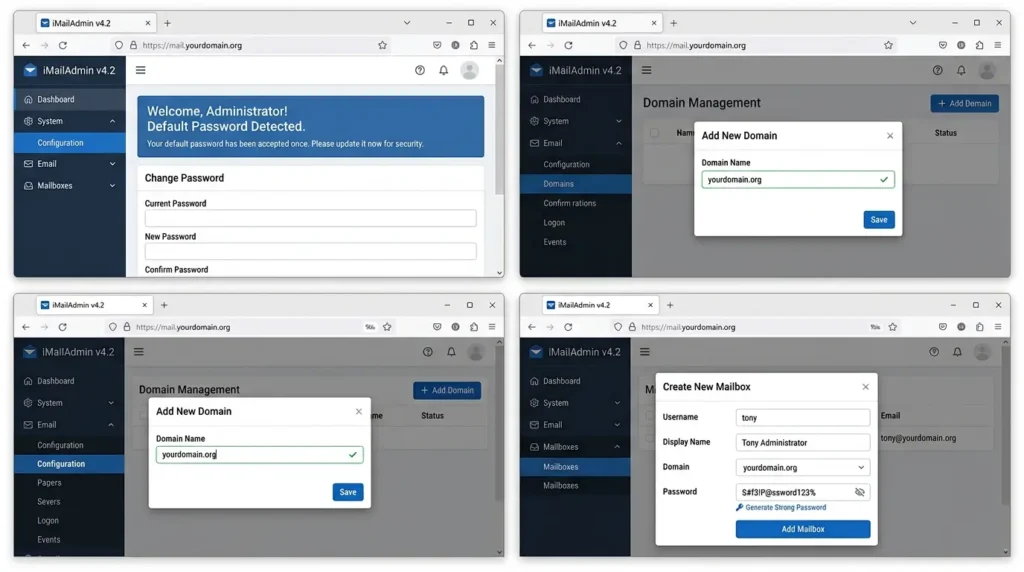
From there:
- Add your domain: Email → Configuration → Domains → Add Domain. Enter yourdomain.org, save, and restart SOGo when prompted.
- Create your first mailbox: Mailboxes → Mailboxes → Add Mailbox. Fill in a username, display name, and a strong generated password. Your domain should already be pre-selected.
Your address, tony@yourdomain.org, now exists. It just can't send trustworthy mail yet. That's the next part.
Step 7: The Authentication Trio - SPF, DKIM, and DMARC
This is where most self-hosted setups quietly fail. The server works, the mailbox exists, but every message lands in spam because the receiving provider has no way to trust it came from you.
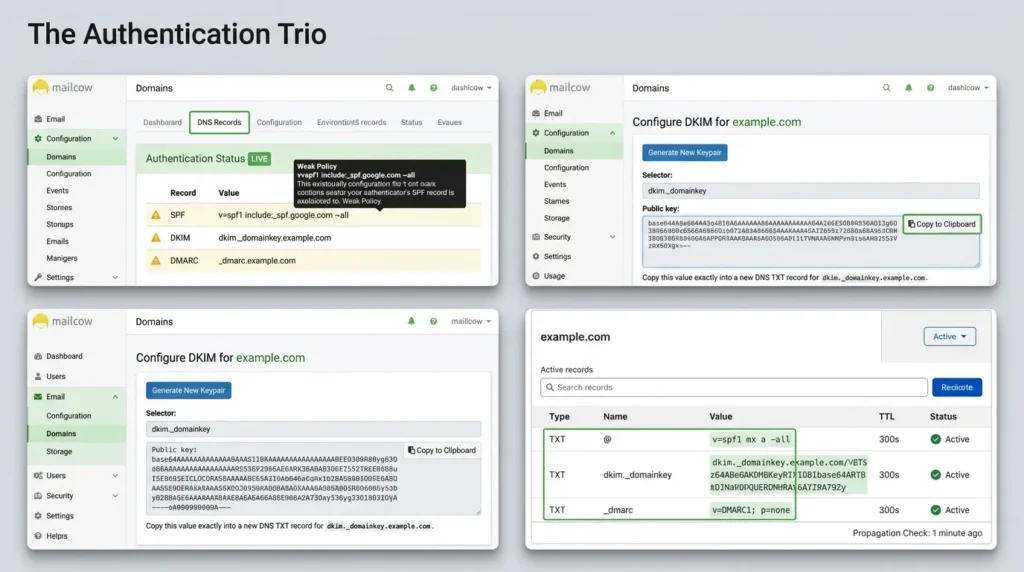
Head to Email → Configuration → Domains, click your domain, then click DNS. Mailcow shows a live status panel for every record it expects.
What Is SPF?
SPF (Sender Policy Framework) is a DNS TXT record listing which mail servers are allowed to send on behalf of your domain. For a single-server setup, this is enough:
The -all at the end means "reject anything not explicitly listed", the strictest, most trustworthy setting available.
What Is DKIM?
DKIM (DomainKeys Identified Mail) attaches a cryptographic signature to every outgoing message. Receiving servers check that signature against your public key in DNS to confirm the message wasn't altered in transit. Mailcow generates this key automatically, copy the TXT value it shows you into a record named dkim._domainkey.yourdomain.org.
DMARC - The Policy That Ties SPF and DKIM Together
DMARC tells receiving servers what to do when SPF or DKIM checks fail, and sends you reports on your domain's email activity. Start conservative:
Record name: _dmarc.yourdomain.org.
🚨 Wait Before Tightening DMARC
Give DNS and your DKIM signature at least 48 hours to propagate cleanly before you even think about moving DMARC past p=none. Jumping straight to p=reject on a fresh server is one of the fastest ways to have legitimate mail silently dropped.
This isn't optional anymore for anyone sending real volume. As of February 2024, Gmail's official sender guidelines require senders of 5,000 or more messages a day to authenticate their outgoing email, avoid sending unwanted mail, and make unsubscribing easy, and enforcement has only gotten stricter since, with Gmail ramping up rejections of non-compliant traffic starting in November 2025. A self-hosted server that skips this trio isn't just risking spam-folder placement anymore; it risks outright rejection.
TLSA - Encrypting the Connection Itself
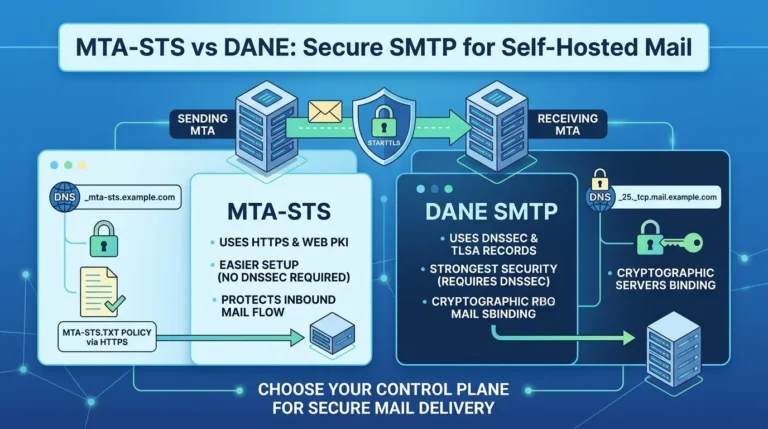
TLSA ties your mail server's TLS certificate to DNS, which stops man-in-the-middle attacks against encrypted mail connections. Mailcow generates the value for you, but TLSA only works if you also enable DNSSEC on your domain, usually a single toggle in your registrar's settings.
SPF says who can send, DKIM proves the message wasn't tampered with, DMARC decides what happens when either fails. Skip one and the other two lose most of their value.
TLSA is only one part of the broader SMTP transport-security decision. Before enabling it in production, compare its DNSSEC and certificate-management requirements with MTA-STS in our guide to MTA-STS vs DANE for self-hosted mail.
Step 8: Testing Before You Trust It
Don't email a real person yet. Use mail-tester.com first, it gives you a throwaway address, you send a real test message to it (not a one-word "test," which spam filters flag on its own), and it scores your setup out of 10.
Anything at 9/10 or above is solid. A perfect 10 is possible but not guaranteed on a brand-new IP, and that's fine, what matters more is the next step: send an actual email to a Gmail account and confirm it lands in the inbox, not spam.
✅ Pre-Send Deliverability Checklist
- IP is not on a spam blocklist (check via mxtoolbox.com)
- PTR record maps your IP to mail.yourdomain.org
- MX record points to mail.yourdomain.org
- DKIM shows valid in the mailcow panel
- SPF is set:
v=spf1 mx a -all - DMARC is set with
p=noneto start - DNSSEC and TLSA are both active
- Every mailcow container shows status "Up"
- mail-tester.com score is 9/10 or higher
When Something Breaks: Reading the Error Messages
Sooner or later, a message won't send, or it'll vanish somewhere between "sent" and "received," and you'll be staring at a log with no idea what any of it means. Here's how to actually read it instead of guessing.
Making Sense of Postfix Error Codes
Postfix errors follow a simple pattern: the first digit tells you whether it's worth retrying.
| Code | Type | What It Usually Means |
|---|---|---|
| 421 | Temporary | Receiving server is too busy or rate-limiting you — will retry automatically |
| 450 / 451 | Temporary | Greylisting, or a local mailbox issue on the recipient's side |
| 550 | Permanent | Rejected — usually a blocklisted IP, missing PTR, or failed SPF/DKIM |
| 551 / 553 | Permanent | Mailbox doesn't exist, or your "From" address doesn't match an authorized domain |
| 554 | Permanent | Transaction failed — often a catch-all for "your message was flagged as spam" |
Check Postfix's own log for the exact reason behind any of these:
Bash:
sudo docker compose logs postfix-mailcow --tail=100Reading Rspamd When a Message Gets Rejected
A 550 from Postfix tells you that something was rejected. Rspamd, mailcow's spam engine, tells you why, in far more useful detail.
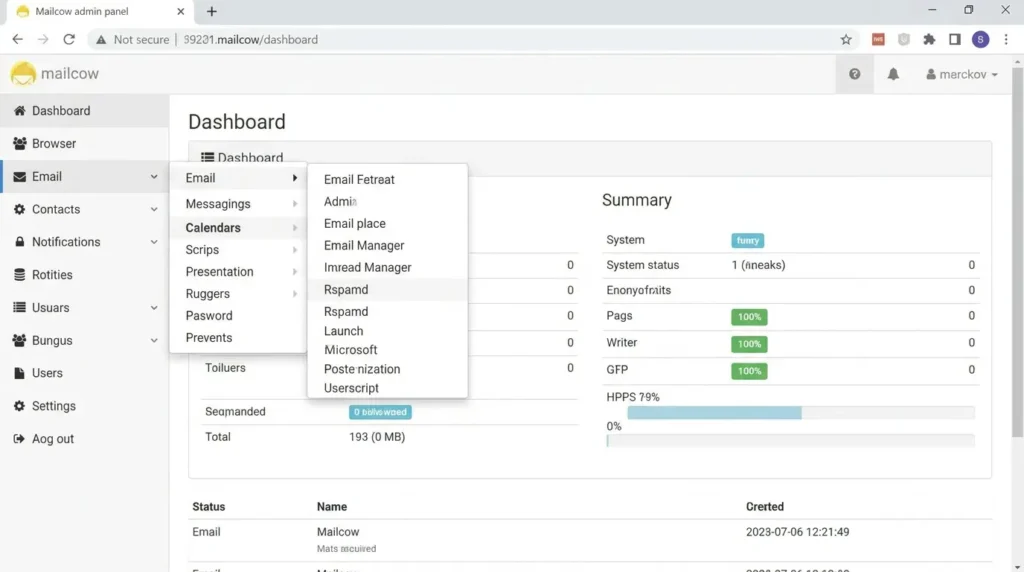
In the mailcow admin panel, open Email → Rspamd (or visit the Rspamd web UI directly) and click the History tab. Every processed message shows a score breakdown by symbol, short codes explaining exactly what triggered the score. A few worth recognizing:
- DKIM_INVALID or DKIM_REJECT, your DKIM signature failed verification, usually from a DNS record that hasn't propagated yet
- DMARC_POLICY_REJECT, the message failed your own DMARC policy, often during the 48-hour propagation window mentioned earlier
- RBL_SPAMHAUS or similar, your sending IP is listed on a blocklist Rspamd checks automatically
- MISSING_MID, the message is missing a Message-ID header, a hallmark of poorly formed automated mail
The score total at the top of each log entry is what decides whether a message ships, gets flagged, or gets dropped, and the symbol list underneath is your actual troubleshooting checklist, not the vague bounce message the sender saw.
A bounce code tells you something failed. Rspamd's History tab tells you what to actually fix, always check both before assuming your whole setup is broken.
The Rollout Mistake Almost Nobody Warns You About
Here's the part that surprises people: a technically perfect setup can still fail, because deliverability isn't just about configuration, it's about reputation, and reputation has to be earned over time.
A brand-new IP has no history. Send a burst of a hundred emails from it on day one, and anti-spam systems read that as bot behavior, not enthusiasm. You'll get blocklisted before you've had a real conversation.
📈 Safe IP Warm-Up & DMARC Rollout Timeline
Keep DMARC at p=none. Send 5–10 manual emails a day to real people who'll open and reply. Zero automated or bulk mail.
Check your DMARC reports. If SPF/DKIM are passing cleanly, move to p=quarantine and raise volume to 20–50 emails a day.
Move DMARC to p=reject. Your domain is now protected against spoofing, and your IP has a genuine track record with major providers.
Create a dedicated mailbox, something like dmarc@yourdomain.org, to catch the automated DMARC reports providers send you. Read them. They'll surface a broken record long before it becomes a full-blown deliverability crisis.
Deliverability is a trust score you build over weeks, not a switch you flip once. Rushing the warm-up undoes everything the DNS work accomplished.
Common Mistakes People Make (and How to Skip Them)
- Creating the DMARC record too early: Before DKIM has propagated, a strict DMARC policy will flag your own legitimate mail as failing authentication.
- Confusing the hostname with the email domain: mail.yourdomain.org is the server; tony@yourdomain.org is the address. Mixing them during mailcow's config generator breaks autodiscovery.
- Blocking crawling and expecting instant results: IP warm-up isn't a formality, sending bulk volume from a fresh IP in week one is the single most common reason new servers get blocklisted.
- Choosing a VPS provider that blocks port 25, without checking first, then discovering it three hours into setup.
- Disabling DMARC monitoring after go-live: Reports catch broken SPF alignment (say, after adding a new sending tool) before it silently tanks your deliverability.
- Running everything as root: It works right up until it doesn't, and by then the exposure is already on the server.
- Skipping the mail-tester.com check and sending straight to a real inbox. A 4/10 score tells you exactly what's broken; a bounced email to a client doesn't.
Almost every deliverability horror story traces back to one of these seven mistakes, not to mailcow itself.
The Fallback Plan: Relaying Through a Smarthost
Sometimes you do everything right and one provider still won't budge. Microsoft's ecosystem in particular has a reputation for being stubborn about mail from brand-new IPs, regardless of how clean your SPF, DKIM, and DMARC are. New senders sometimes sit in a probation period no amount of correct configuration shortens.
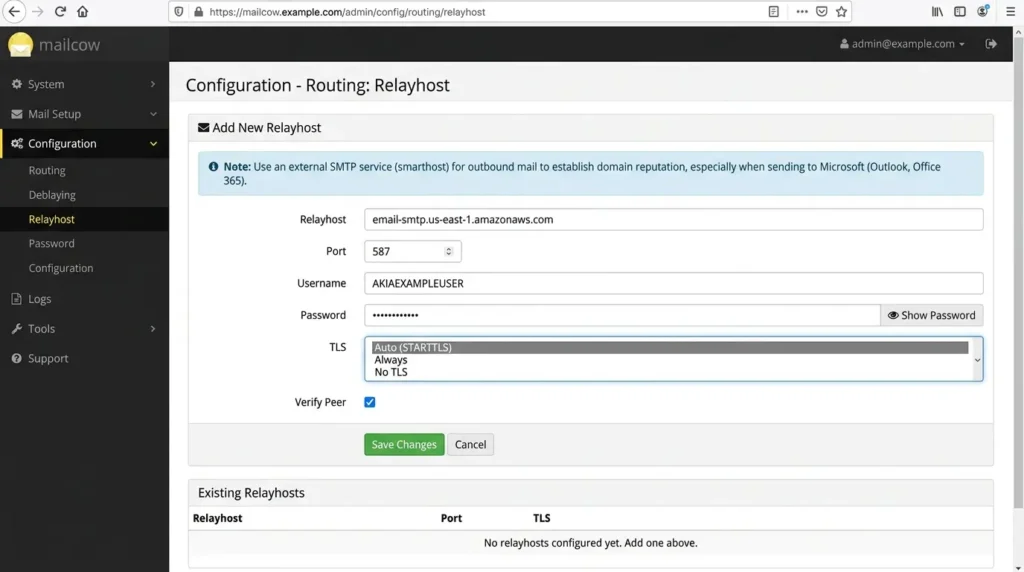
For that situation, mailcow supports relaying outbound mail through a third-party SMTP service, commonly called a smarthost, instead of sending directly from your own IP. Services like Amazon SES, SendGrid, or Mailgun already have long-established sending reputations, and they charge a fraction of a cent per email at low volume.
To configure it: in the mailcow admin panel, go to Configuration → Routing → Relayhost, and add your smarthost's SMTP credentials (host, port, username, password) as provided by that service. Mailcow will route outbound mail through it while incoming mail still lands directly on your server.
This isn't an admission of defeat, treat it as a warm-up crutch. Once your domain has a few months of clean sending history and your own IP reputation is established, you can switch back to sending directly and drop the relay fee entirely.
A smarthost isn't cheating, it's a pragmatic bridge for the weeks before your own IP has earned enough trust to stand on its own.
Securing the Server After It's Live
Getting mail flowing is step one. Keeping it safe is ongoing, and it matters more here than on a typical web server, because a compromised mail server can be weaponized to spam the entire internet under your domain's name.
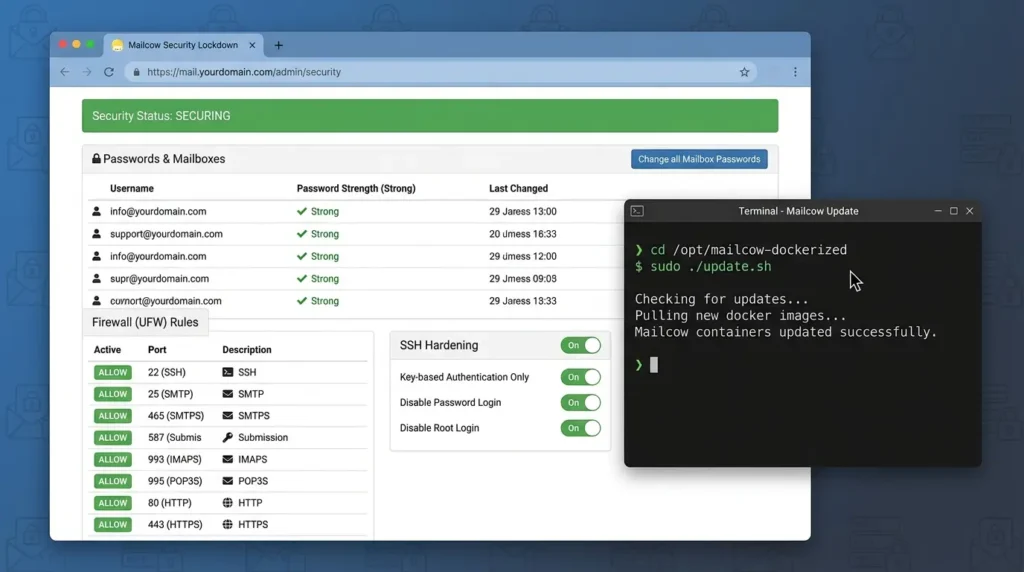
- Rotate every default password. You already changed the mailcow admin password, make sure every mailbox uses a strong, unique one too.
- Restrict the firewall (UFW) to only the ports you actually need: 22 (SSH), 25 (SMTP), 465/587 (SMTPS/Submission), 993/995 (IMAPS/POP3S), 80/443 (HTTP/HTTPS).
- Harden SSH. Switch to key-based authentication, disable password login entirely, and disable root login over SSH. This one change removes the most common attack vector against any internet-facing VPS.
- Keep mailcow updated. The project ships regular security patches:
Bash:
cd /opt/mailcow-dockerized sudo ./update.shTurning On Two-Factor Authentication
A strong password is step one. It's not the whole job — password-only access on internet-facing admin panels and mailboxes is exactly what phishing and credential-stuffing attacks are built to defeat. Mailcow supports 2FA for both layers, and there's no good reason to skip either.
For the mailcow admin panel:
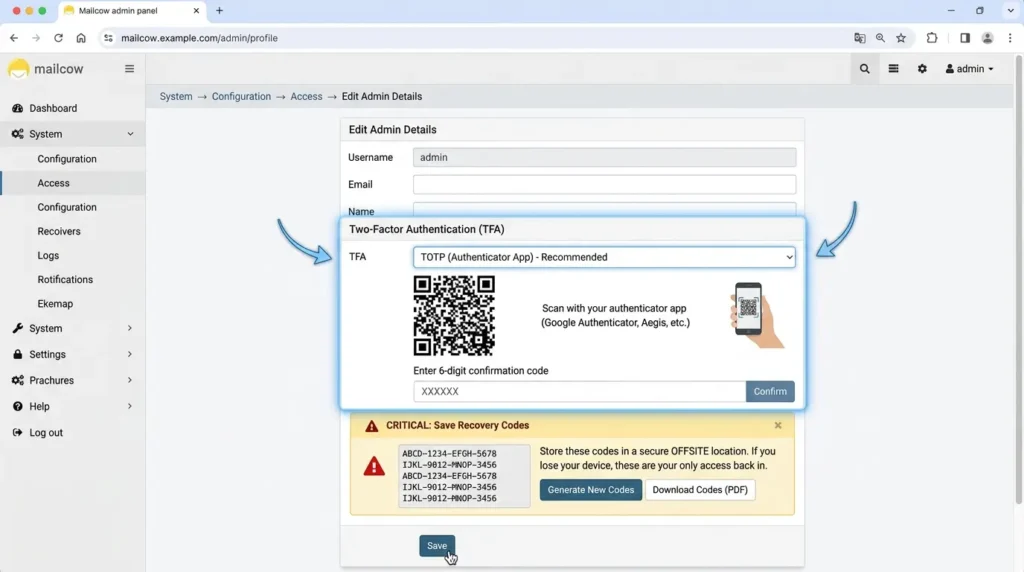
- Log in as admin, then go to System → Configuration → Access → Edit Admin Details.
- Find the TFA (two-factor authentication) section and choose your method, TOTP (an authenticator app like Google Authenticator or Aegis) is the simplest and doesn't depend on SMS.
- Scan the QR code with your authenticator app and confirm with the six-digit code it generates.
- Save your recovery codes somewhere outside the server itself, if you lose the device and the server at the same time, those codes are the only way back in.
For individual mailboxes in SOGo webmail:
- Log into SOGo as the user (not the admin panel).
- Open Preferences → General, and look for the Multi-Factor Authentication option.
- Enable it and pair an authenticator app the same way as above.
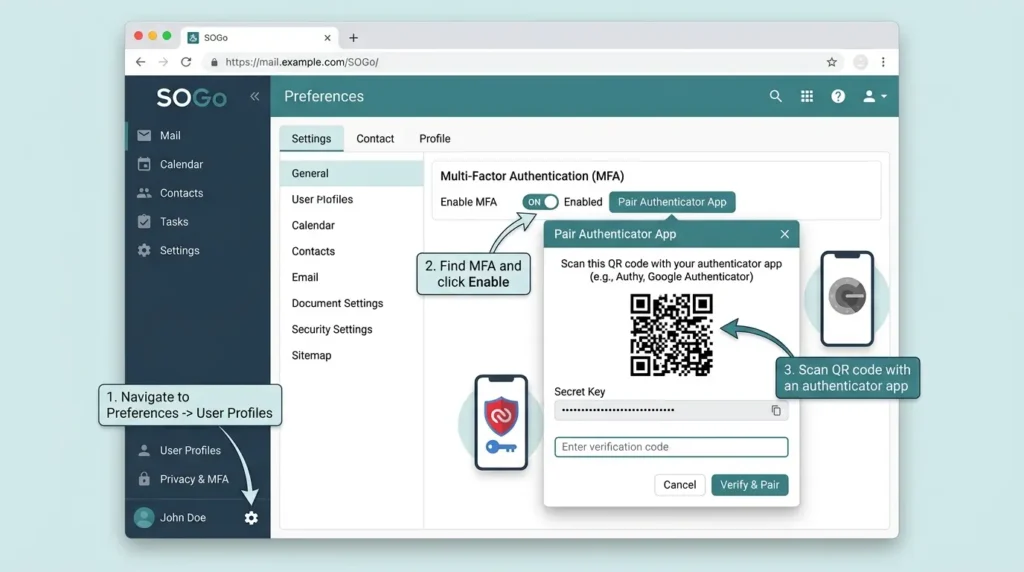
Do this for every mailbox that matters, not just the admin account. The admin panel controls the whole server, but a compromised individual mailbox is still a compromised mailbox, and often the one attackers actually want, since it's where the real conversations live.
SSH hardening protects the server. 2FA protects the accounts on top of it. Skipping either leaves the other half of the door unlocked.
Blocking Brute-Force Attempts and Tuning Spam Learning
A mail server on a public IP gets probed constantly. Within days of going live, you'll see repeated login attempts against Dovecot's IMAP port and Postfix's submission port, mostly automated credential-stuffing scripts working through common username lists, not a targeted attack on you specifically. That doesn't make it safe to ignore.
Fail2ban is mailcow's answer to this, and it's already built in, it just needs a look
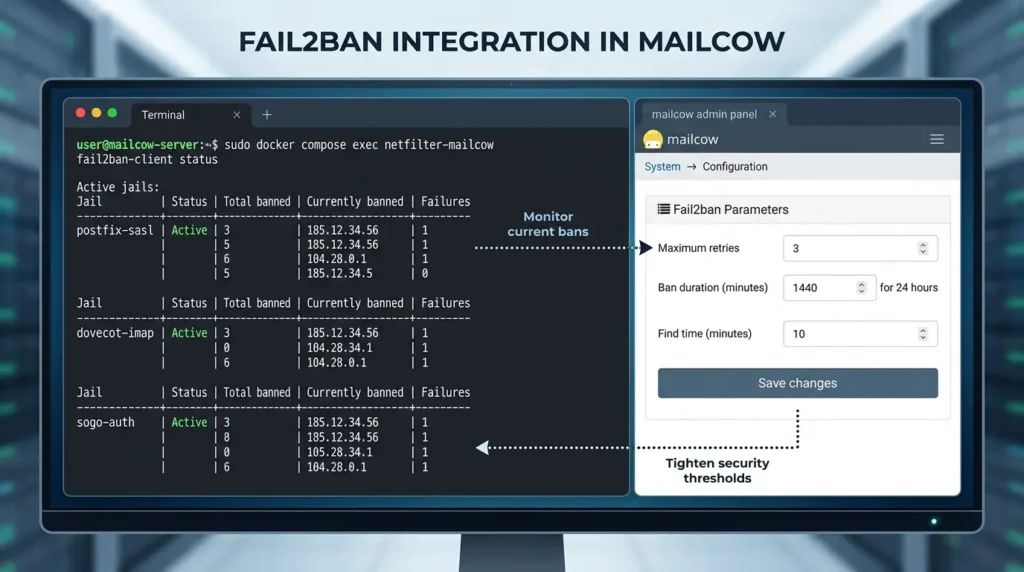
The container watches authentication logs across Postfix, Dovecot, and SOGo, and temporarily bans an IP after a set number of failed attempts. Check what's currently banned:
Bash:
sudo docker compose exec netfilter-mailcow fail2ban-client statusYou can tighten the default thresholds, how many failed attempts before a ban, and how long the ban lasts — from the mailcow admin panel under System → Configuration → Fail2ban Parameters. For a server that only you and a small team access, dropping the retry limit and extending ban duration well beyond the defaults costs you nothing and meaningfully cuts down brute-force noise in your logs.
Rspamd's fuzzy learning is the other half of staying accurate over time
Spam patterns shift, and a spam filter that isn't learning from your own mail flow gradually drifts out of date. When a message is misclassified, spam that got through, or legitimate mail that got flagged, open the Rspamd web UI, find it in the History tab, and mark it correctly. Rspamd folds that correction into its scoring for future messages, which matters far more on a self-hosted server than it does on Gmail, since you don't have a company-wide dataset training the filter for you, just your own traffic.
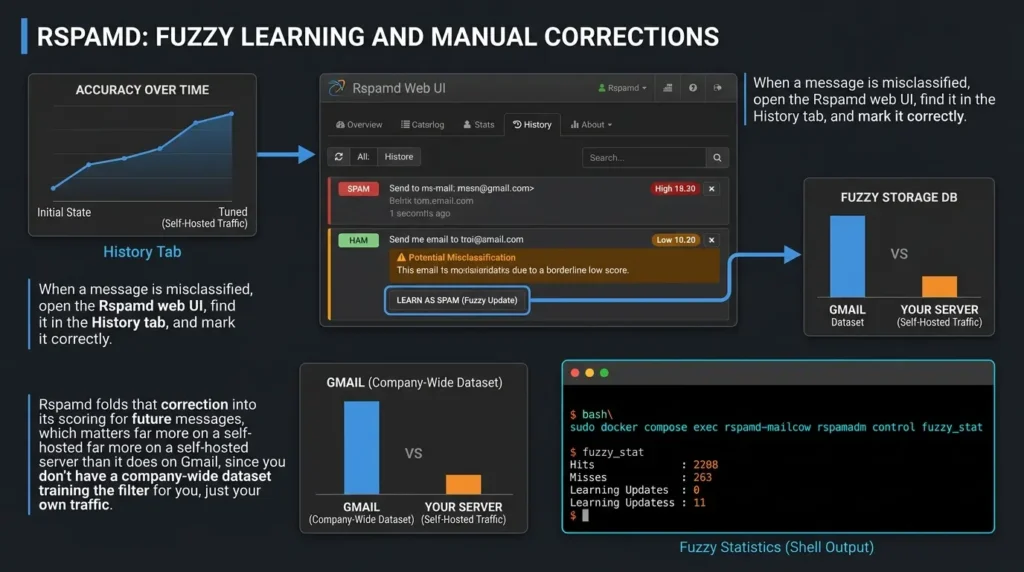
Check on it periodically rather than assuming it's tuned correctly forever:
Bash:
sudo docker compose exec rspamd-mailcow rspamadm control fuzzy_statFail2ban stops the noise from becoming an actual breach. Fuzzy learning keeps Rspamd accurate as spam tactics evolve, neither one is "set once and forget," and both are worth a five-minute check on the same schedule you check your blocklist monitors.
Your Backup Plan Is Not Optional
There's no version of self-hosted email that's acceptable without a real backup strategy. A dead disk, a botched update, or a compromised container can erase every mailbox you've built, and unlike a SaaS provider, there's no support line to call to recover it for you.
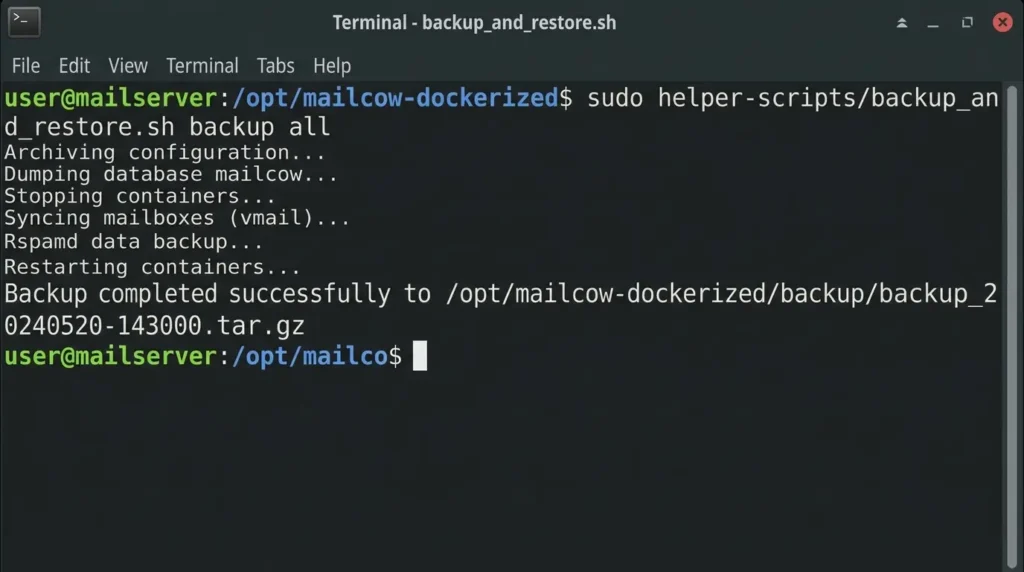
Mailcow ships a backup script that handles this for you out of the box:
Bash:
cd /opt/mailcow-dockerized sudo helper-scripts/backup_and_restore.sh backup allThat single command backs up every container's data, mailboxes, the database, Rspamd's learned spam data, and your configuration. Running it manually once is a start. Running it automatically, unattended, is what actually protects you.
Add it to a cron job so it runs on its own every night:
Bash:
crontab -e # add this line for a 3 AM daily backup 0 3 * * * cd /opt/mailcow-dockerized && sudo helper-scripts/backup_and_restore.sh backup all --delete-days 7A backup that lives on the same disk as the thing it's backing up isn't really a backup, it's a copy that fails at the same time as the original. Push it somewhere else entirely, ideally an object storage service like AWS S3 or Backblaze B2, using something like rclone or restic in the same cron job. The extra ten minutes of setup is the difference between "annoying afternoon" and "the business lost a week of email permanently."
An unautomated backup is a backup you'll forget to run right before you need it. Automate it and move a copy off-server the same day you go live.
How Will You Know If Something Breaks?
Once mail is flowing, the biggest risk shifts from "can I set this up" to "will I notice if it stops working." A blocklisting event, a full disk, or a failed container can all happen quietly, and the first sign is often a client asking why their email never arrived.
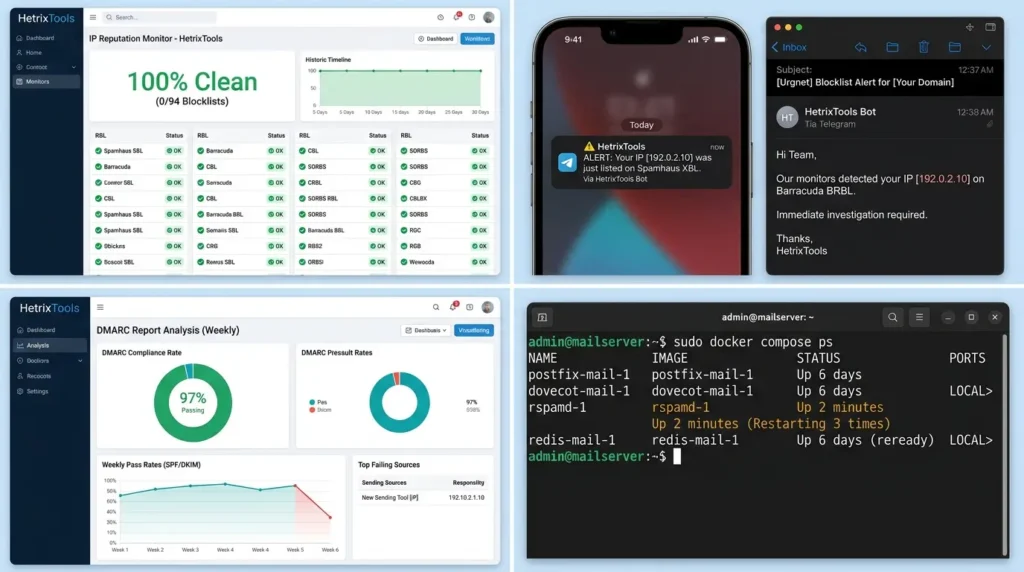
A few low-effort habits close most of that gap:
- Monitor your IP's blocklist status continuously, not just once during setup. Free tools like HetrixTools or MXToolbox Monitors check your IP against dozens of blocklists on a schedule and alert you the moment something changes.
- Set up alerting, not just dashboards. Both tools above support push notifications through email or a Telegram bot, configure it once and you'll know about a blocklisting within minutes instead of discovering it when someone complains.
- Watch your DMARC reports on a schedule, not only when something feels wrong. A sudden drop in SPF or DKIM pass rate is usually the earliest warning sign of a misconfiguration, often one you introduced yourself by adding a new sending tool.
- Check container health weekly with sudo docker compose ps even when nothing seems wrong, a container quietly restarting in a crash loop can degrade performance long before it fully fails.
A mail server you don't monitor is a mail server that's already failing somewhere, you just haven't found out yet.
Does Self-Hosting Actually Save Money? Run the Numbers
This is the uncomfortable part most self-hosting guides skip. Everyone assumes "no monthly per-seat fee" automatically means cheaper. It's not that simple.
A VPS with 8 GB RAM typically runs $30–$50 a month regardless of how many mailboxes you create, one mailbox or fifty, the bill doesn't change. Compare that against a per-seat SaaS plan, and the math flips depending entirely on your mailbox count.
Here's the uncommon insight most guides won't tell you: for one or two mailboxes, self-hosting is often more expensive than a SaaS plan for the first year or two. The VPS cost is fixed whether you use one mailbox or ten, so the economics only really tip in your favor once you're running five-plus addresses, or once you factor in what unlimited storage and zero vendor lock-in are worth to you beyond the raw dollar figure. Privacy and control are real value, just don't pretend the spreadsheet always says "cheaper," because it doesn't until your mailbox count grows.
Self-hosting's financial case strengthens with scale. Below a handful of mailboxes, you're paying for control, not for savings.
Two Case Studies: One Success, One Cautionary Tale
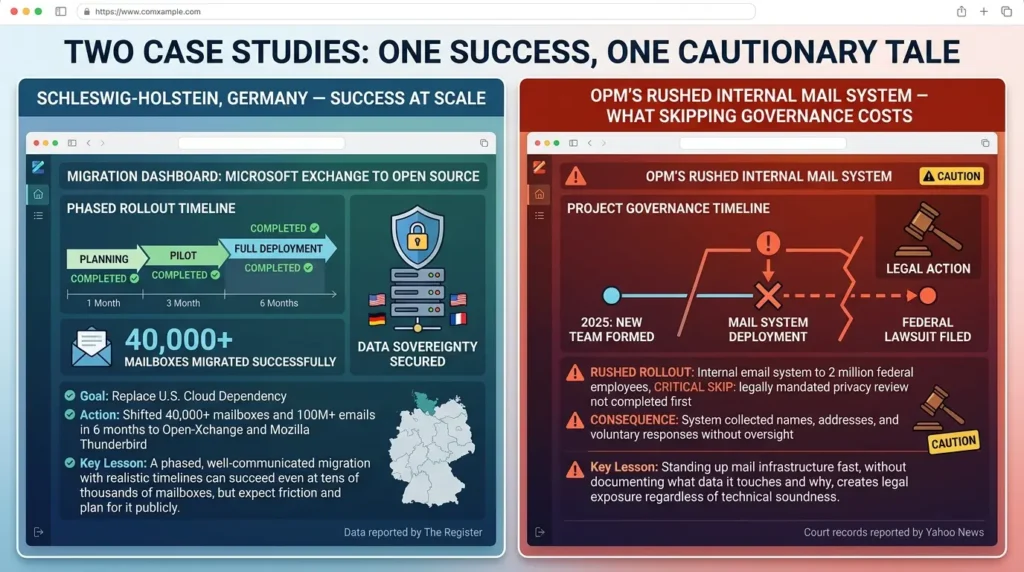
Schleswig-Holstein, Germany — Success at Scale
Facing growing pressure around U.S. cloud dependency and data sovereignty, this German state government committed to replacing Microsoft Exchange and Outlook across its entire administration.
The project, The Register reported, moved more than 40,000 mailboxes and over 100 million emails and calendar entries to Open-Xchange and Mozilla Thunderbird in a six-month window. The lesson for anyone running this guide at team scale: a phased, well-communicated migration with realistic timelines can succeed even at tens of thousands of mailboxes, but expect friction and plan for it publicly rather than pretending it won't happen.
OPM's Rushed Internal Mail System - What Skipping Governance Costs
In early 2025, a newly formed team inside the U.S. Office of Personnel Management stood up an internal email system to message federal employees directly, reportedly without completing the legally mandated privacy review first.
The system collected employee names, government addresses, and short voluntary responses from roughly two million people, and the rushed rollout led to a federal lawsuit, as court records reported by Yahoo News show. The lesson here isn't about mailcow specifically, it's about process. Standing up mail infrastructure fast, without documenting what data it touches and why, creates legal exposure regardless of how technically sound the server itself is.
Where This Fits Into the Bigger Picture
Self-hosted email rarely lives in isolation. Once you're comfortable running mailcow, the same instincts apply to adjacent tools: self-hosted calendars (Open-Xchange, Nextcloud), self-hosted chat, and self-hosted file storage all follow the same authentication-and-reputation logic, prove who you are, protect the transport layer, and monitor continuously rather than configuring once and walking away.
It's also worth watching where email authentication standards are heading. Google and Yahoo's February 2024 bulk sender requirements weren't a one-time policy update, they're part of a broader industry shift where every major provider now treats SPF, DKIM, and DMARC as non-negotiable baseline infrastructure rather than best practice. A self-hosted server that doesn't keep up with that shift will drift out of deliverability over time, even if nothing on your end changes.
Before and After: What Actually Changes
Before: Your email lives on a provider's terms. You pay per mailbox indefinitely, storage caps exist whether you like it or not, and your provider's automated systems — not you, decide what counts as "suspicious" activity on your own account.
After: You control retention, storage, and every address on the domain. There's no per-seat bill once the VPS is running. And when something breaks, you're debugging your own DNS records instead of waiting in a support queue for a company that doesn't know your name.
The trade is real too, you're now the systems administrator, security team, and deliverability analyst, all at once. That's the honest cost of the control you just gained.
Wrapping Up
Running your own email server isn't for everyone, and it shouldn't be sold as effortless. It takes real setup time, ongoing maintenance, and an actual understanding of how authentication works under the hood. But if what you want is genuine privacy, unlimited addresses, and zero dependency on a provider's terms of service, mailcow on a properly chosen VPS is about as clean a path as exists right now.
The DNS work is tedious. The warm-up period demands patience you don't feel like having. SSH hardening isn't optional. But the first time a test email lands cleanly in a Gmail inbox, from your own domain, with nobody else's name on the infrastructure, it's worth every hour the DNS panel cost you.
Go slow, test before you trust it, and keep the server patched. You now have everything you need to do this properly.
Take This Entire Guide With You
Finished reading? Download the clean, printable PDF cheat sheet containing all DNS records, SSH terminal commands, Postfix error codes, and the warm-up timeline.
Direct download • No email sign-up required • 100% Free
Frequently Asked Questions
📋 Article Timeline & History
Successfully updated on September 14, 2026 with the latest details.
This article was originally published on August 10, 2026.

Was this article helpful?



[…] How to Build a Self-Hosted Email Server With Mailcow (Without Landing in Spam) […]
[…] have (or are about to have) a running Mailcow instance, if you haven’t installed it yet, our self-hosted email server setup guide walks through provisioning the VPS and getting the stack online before you get here. What follows […]